Friday Night Etching
I’ve been bitten by the craft bug recently and honestly probably have at least ten projects going at this point… and an entire list of more to do on my phone. This is the first time in YEARS we have *almost* all our belongings in one household, between moving over seas, and back again and apartment living in the city we’ve had a lot of our things in storage.
We are living in a beautiful home in the Boston area and finally have the space and ability to have all our things in one place! This means I’ve gotten my hands on boxes of mine that have some awesome craft supplies that I haven’t had access to for years (some over a decade!!). That combined with us clearing out stuff leaves me with a plethora of items and things I can experiment with and use for crafts! Yay me!

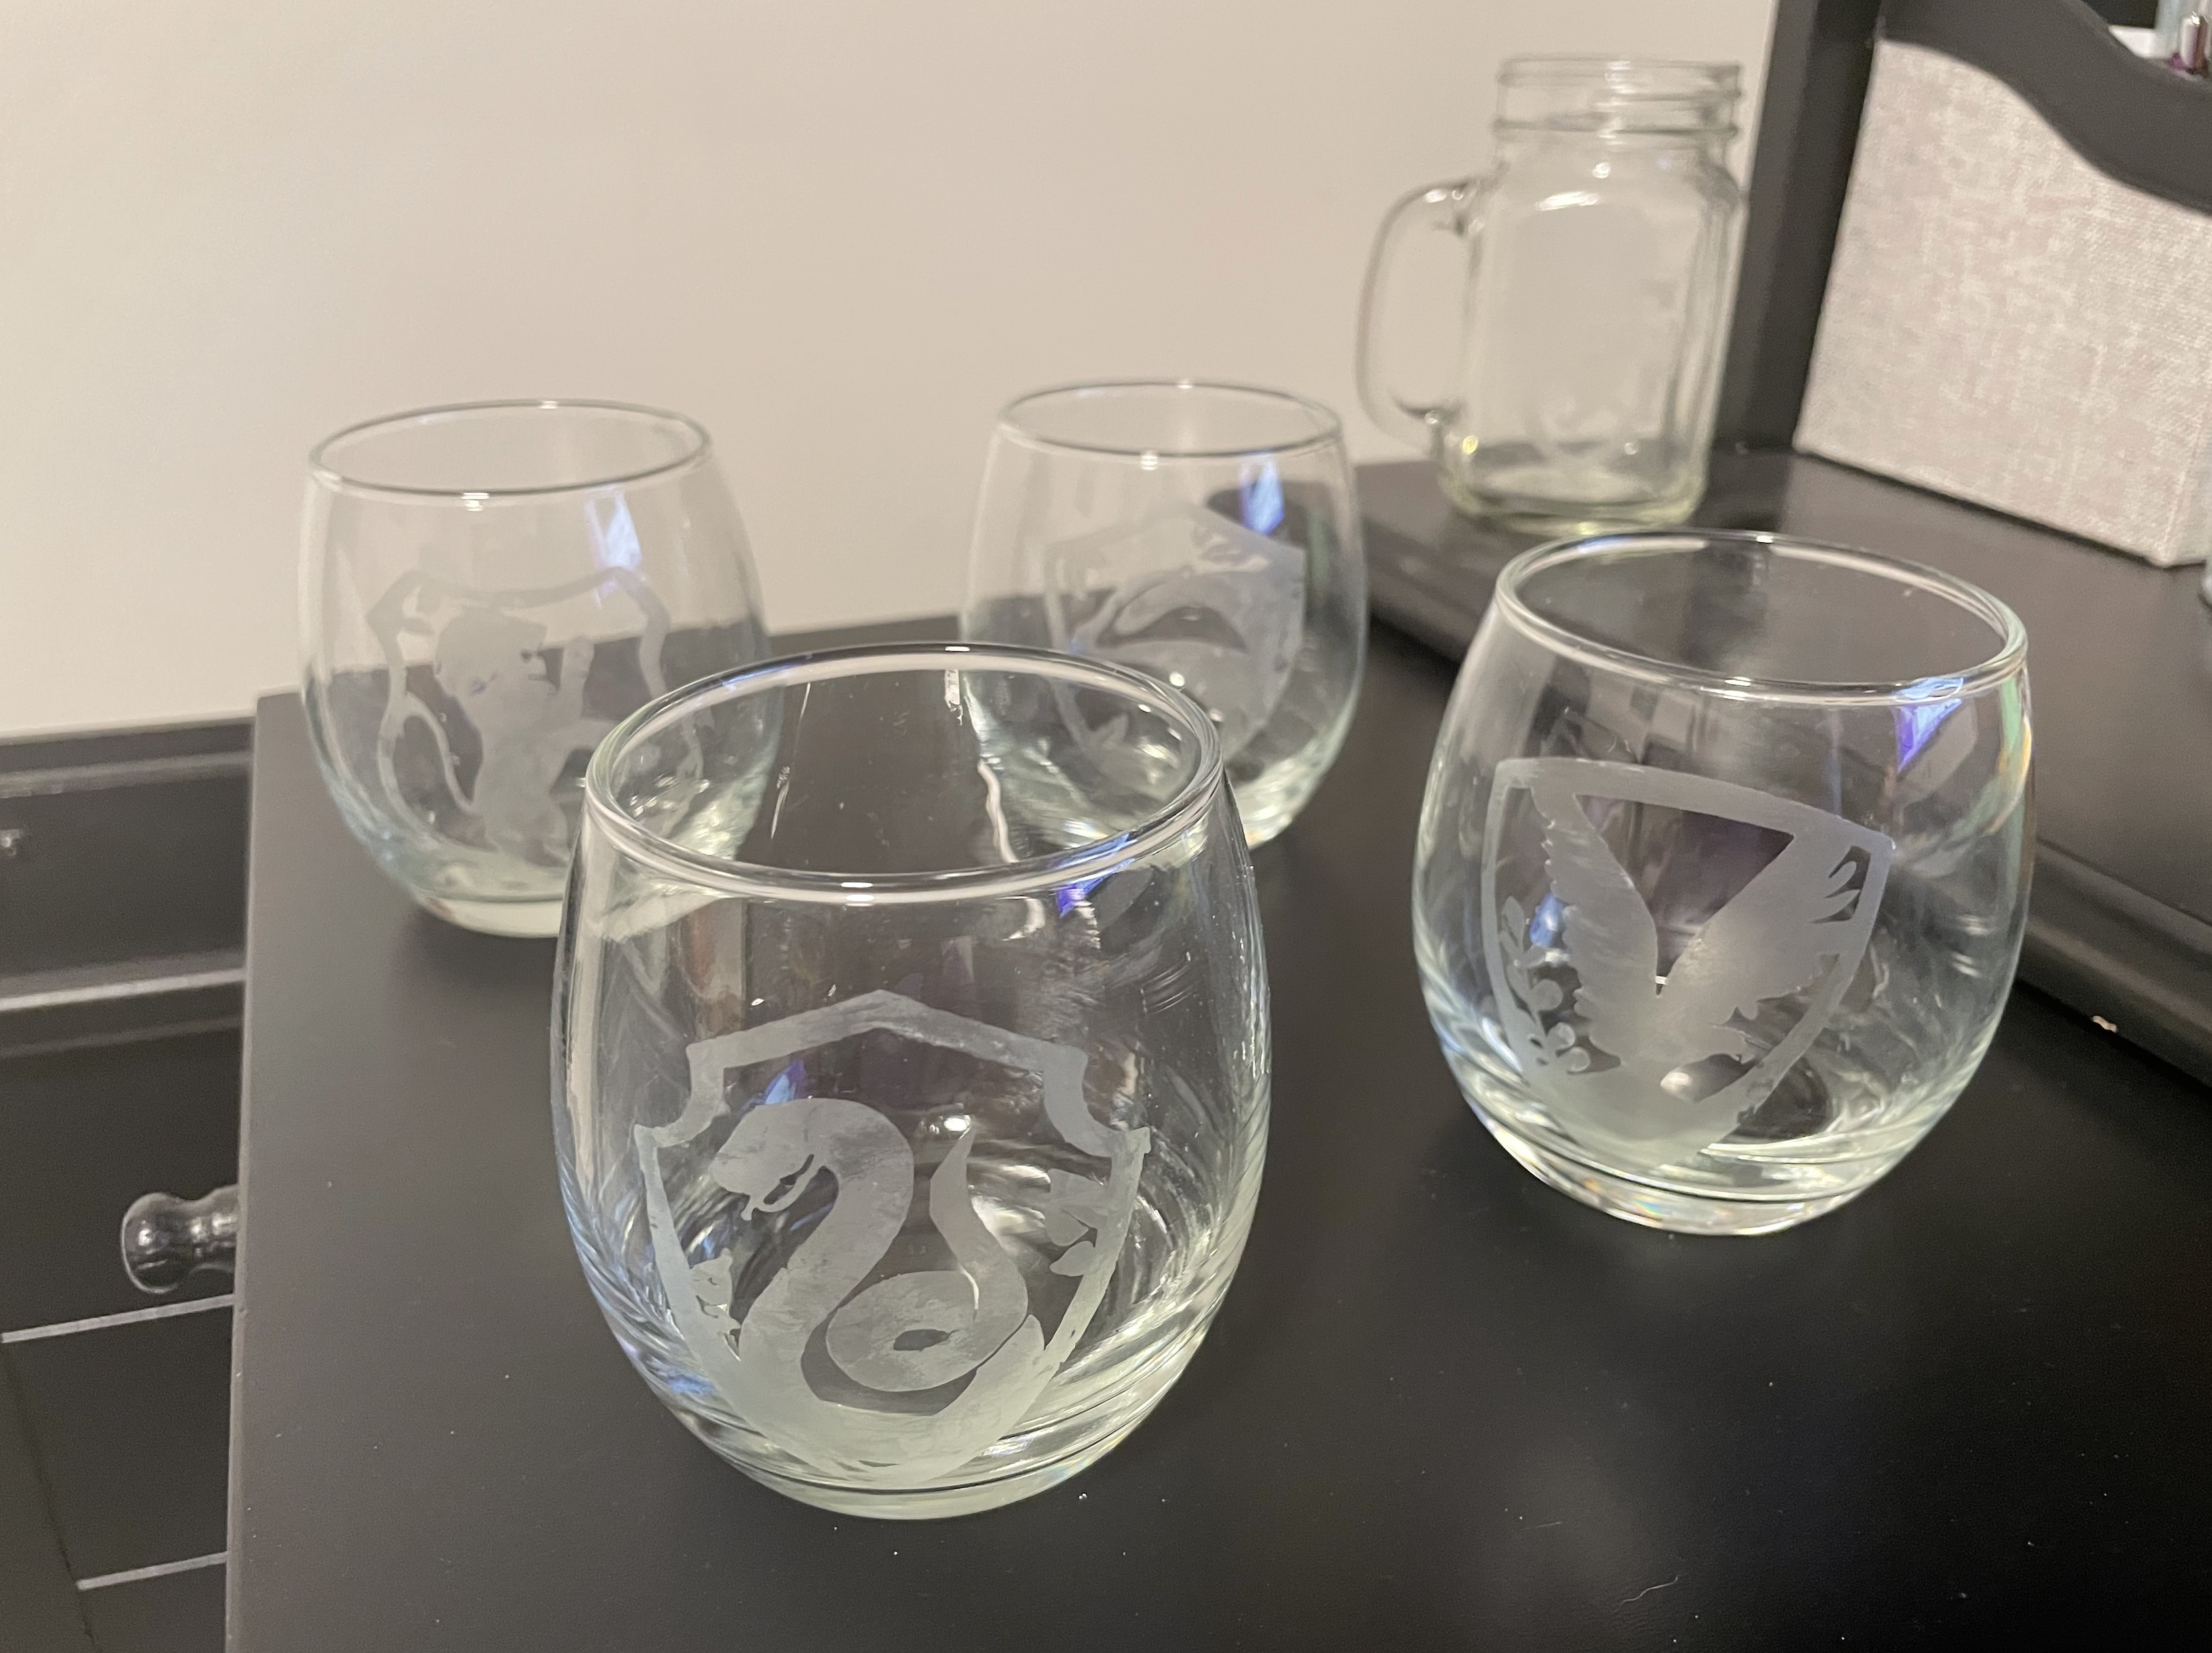
So tonight, I decided to turn our unwanted glassware into something fun and wanted to try my hand at etching! So here is a simple how to so you can do the same. Here’s some things you’ll need or might be useful!
Supplies
- Glassware
- Ruler
- Vinyl
- Transfer tape
- Cricut machine*, other cutting machine or an exacto knife
- Canva*, other design tool or a pencil and paper!
- Painter’s tape, masking tape, scotch tape- any tape will do!
- Armour Etch or similiar glass etching cream
- Small paint brush
- Weeding tool (or tweezers)
- Gloves
- Sink
- Cloth
*These items you don’t have to have to make these but are my preferred options!
Glassware: First, you’re going to want to decide what piece of glass you will be customizing. I literally fished mine out of our donation bin, but you can use ones that need new life, buy a new blank set on Amazon or even head to the dollar store for some cheap options!
Measure: Measure the surface area you want to cover. Keep in mind how much it’s going to need to curve if you don’t have a flat surface to work with. This can make the images a little tricker but definitely still doable!
Design: Next up is designing! There are so many awesome free images online you don’t even have to do this step if you don’t want to, you can just find an image you like online and grab the file or print it out if you’re making a stencil by hand. *Keep in mind that the more simple the image the better it will turn out. You want to look for strong, bold lines that won’t get lost in the transfer. Nothing too thin or detailed!

Cut: Keep in mind any parts that are clear/ cut away will be what is etched and the covered parts will be the regular glass. You can play around with it and see how you’d like your design best- you can use the etching for more of the outline and details, or you can use the etching to be the filler space. Both look great, just depends on the look you’re going for!
If you’re using a cutting machine like my Cricut: Upload your selected or drawn image and remove the background and the sections you want to etch. Upload it to your canvas and size it to fit your glassware. I put a shape behind it to make it a sticker-like easy application. To do this just add a shape (basic cut) and when you put your image on top of it right click both and attach them together. You’re ready to cut out your image on vinyl, then weed it.
If you’re cutting it out by hand: Use a cutting mat or thick material you don’t mind getting cut up like a piece of cardboard or junk placemat. Trace your image onto a piece of vinyl, or carefully tape them both down so it won’t move. Carefully trace your image and cut with an exacto knife, leaving either the outline or the negative space. And pull away or weed the scraps.

Prep: Now carefully wash your glassware because we’re about ready to etch! Want to make sure it’s nice a clean and ready for your image.
Stencil: Use transfer tape over the top of your image, rub it down to make sure it gets any of the little pieces and details. Pull it off the backing and apply it to your glassware where you want it. Carefully remove the transfer tape. Rub on to the glassware very firmly so there is no bubbles or loose edges!
*I couldn’t find any transfer tape until about halfway through my project, so it is possible to do with out it is just a bit tedious. If you’re doing it without, carefully remove the main outline of your image, and then hand pick the little details with tweezers or a weeder to be added on. (Please note: I tried to do this with packaging tape and scotch tape, both ruined my vinyl images so learn from my mistake and if you don’t have transfer tape just do it by hand!!)
Tape: Tape off the edges of your glassware so you don’t accidentally etch anywhere but on your stencil. Now you’re finally ready to paint!
Etch: Using a little paintbrush and GLOVES dab on the glass etch cream. I used Armour Etch, it had really good reviews and I liked me results! Make sure your whole stencil is covered and then wait 5 minutes.
Wash & Dry: Wash it off directly under the sink. I used the paintbrush to get the rest off, and then washed the whole glass with soap and water with the stencil still on. I let air dry and then I removed the stencil.
At this point it didn’t look like much, but once you pulled away the stencil viola! You have etched glass! Once you get the hang of it, it is so fun to personalize glassware, it can be just for fun or makes for really great gifts. I’m already getting started on my Christmas list!
Enjoy!

My Pro Tip: CANVA! I have been a Canva user since 2018, I used it for my business as well as for fun projects at home, and gifts. It’s so easy to use and the database of graphics is endless which makes it so much fun! You can also easily upload one of your own and edit as needed. There is even a free version and if you’re just a crafting dabbler it will be all you need!
Just a heads-up! This post may have some affiliate links. If you click through and make a purchase, I might earn a tiny commission—at no extra cost to you. Think of it as a little ‘thank you’ for my coffee fund ☕️!
