Thanksgiving often gets overlooked with Christmas being on so many minds. I wanted to make a fun, easy (and quick!) little wreath for our door to celebrate the Fall season and Thanksgiving before turning everything over in our home into Christmas! This little project was so simple and fun to make and I had all these things laying around my home.
Things You’ll Need:
- Cardboard
- Scissors
- Yarn
- Burlap or other desired fabric
- Felt
- Hot glue gun
- Any other desired design elements
Making The Base:
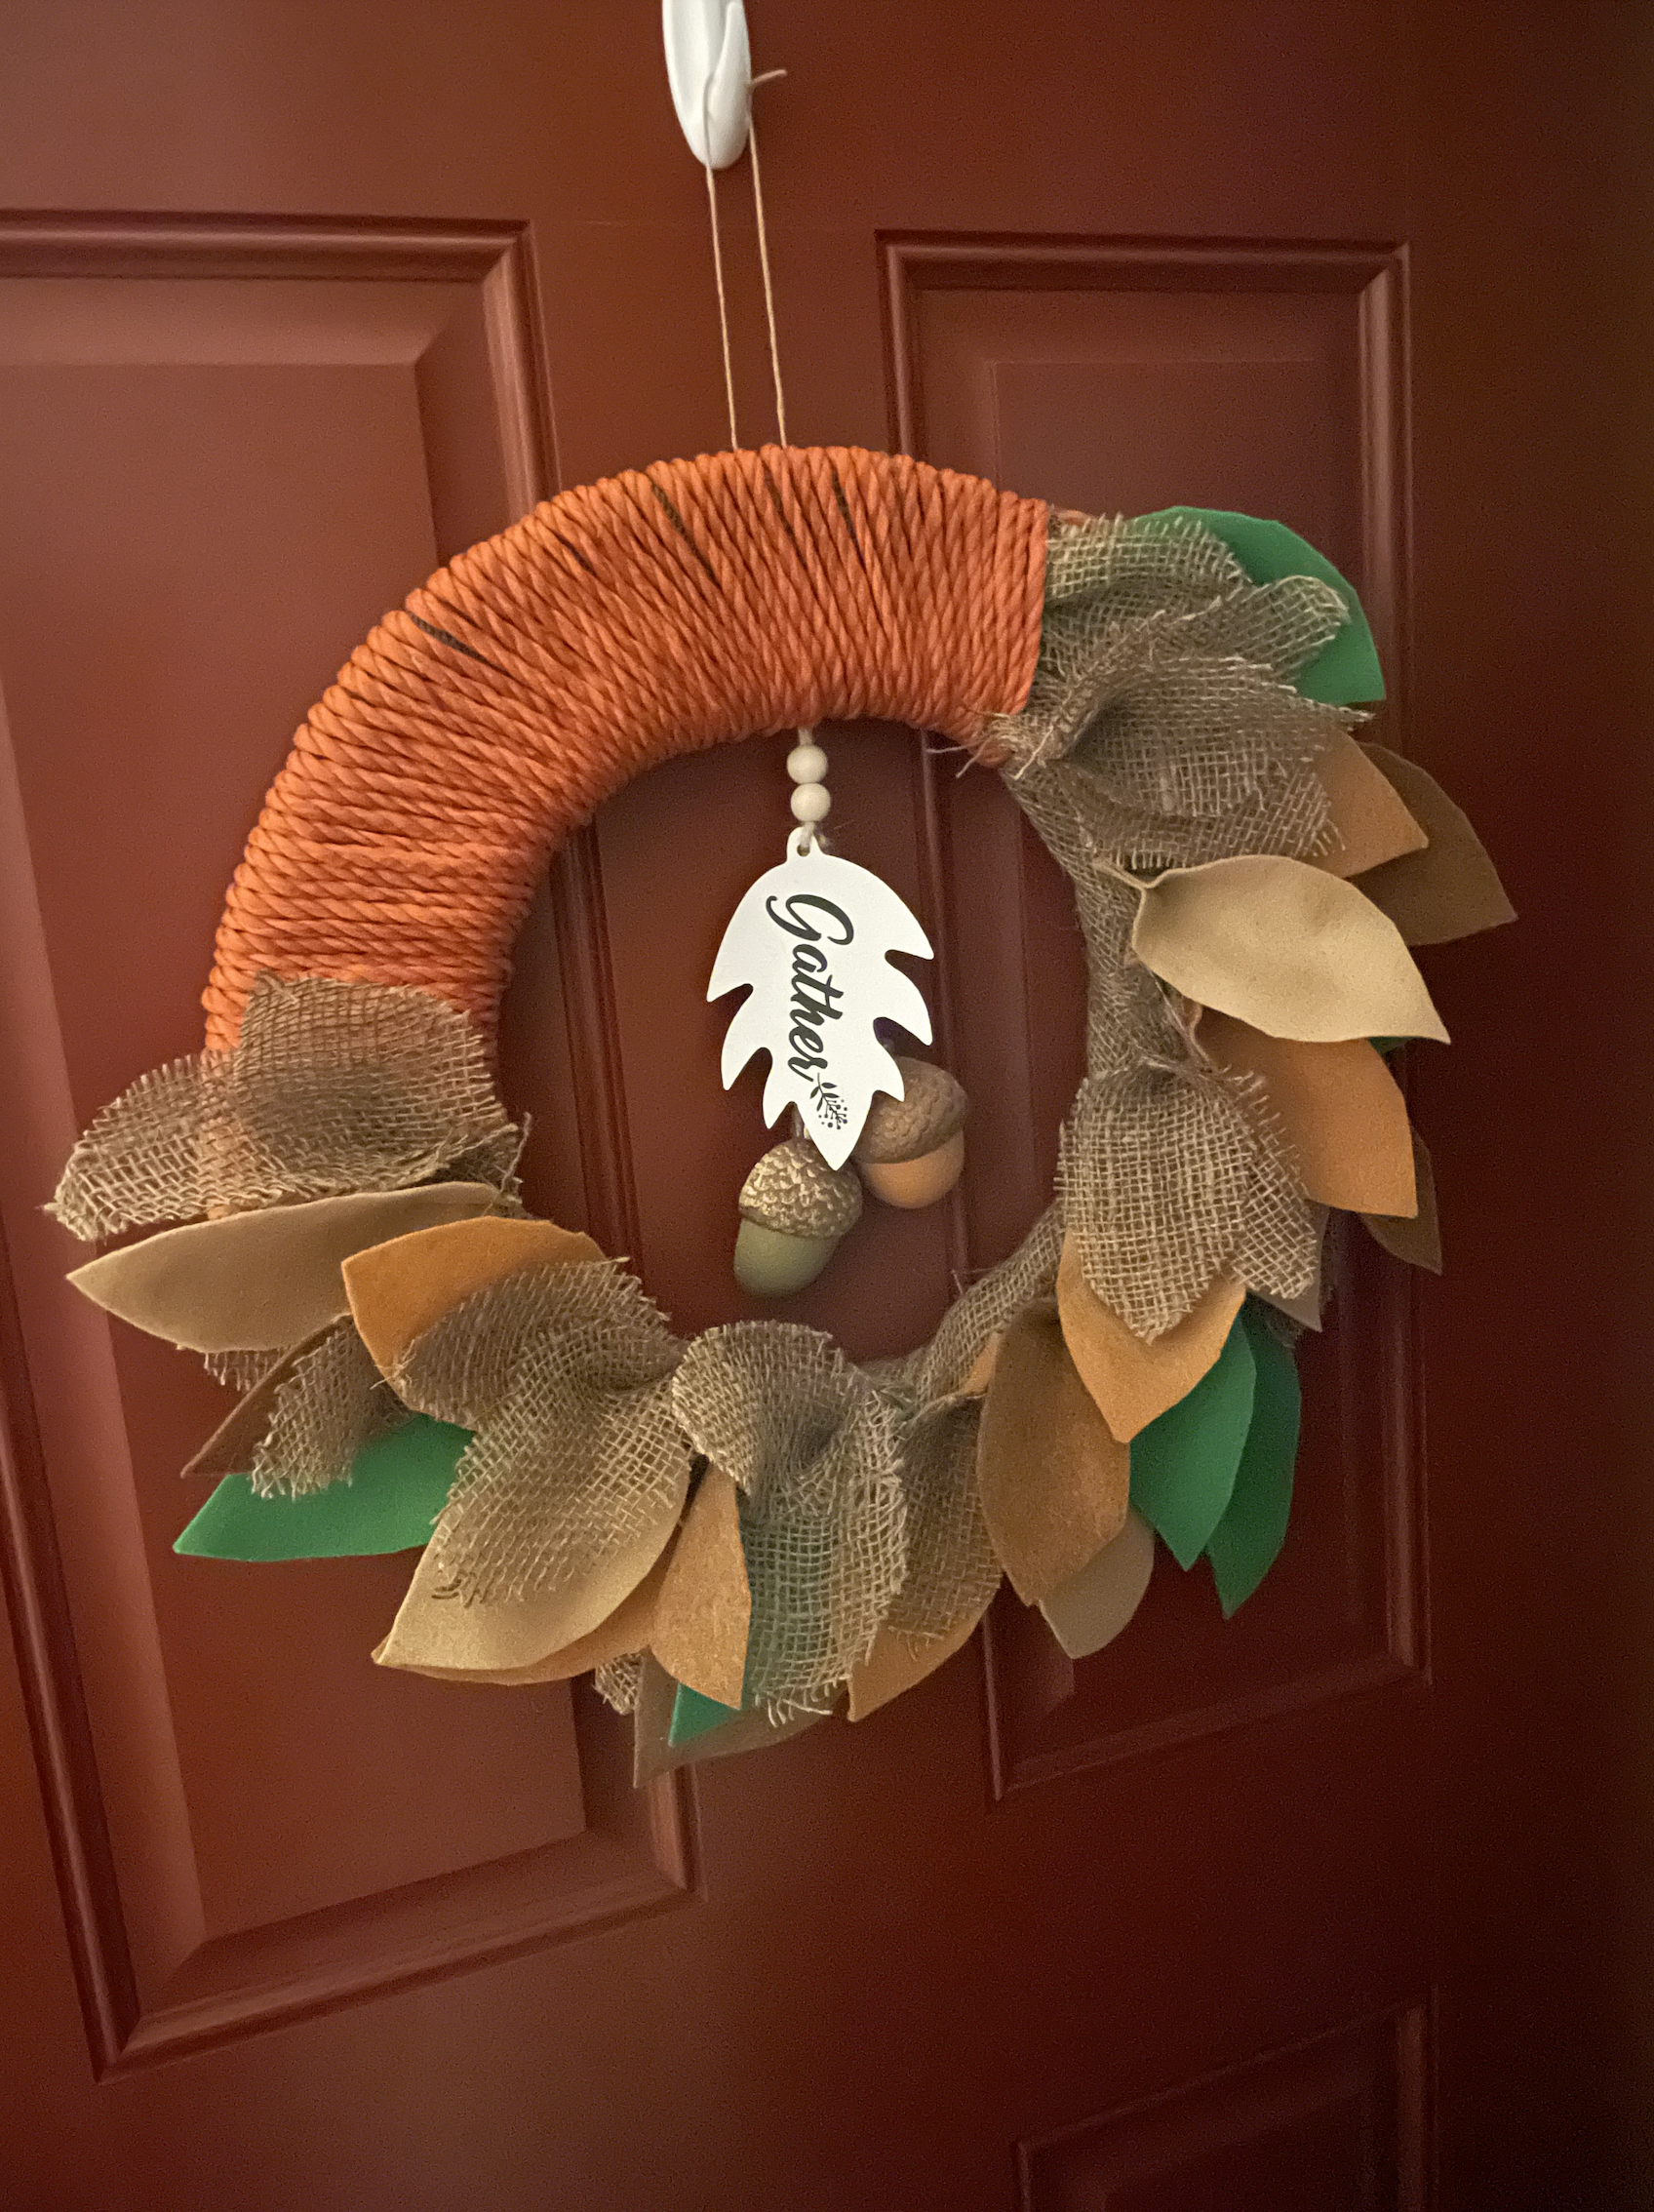
What I love about this project is you don’t even need a wreath base you can simply make your own out of all those cardboard boxes hanging around from present deliveries. I cut two circles out of a spare cardboard box and cut out the middle. You can glue it or tape it together to make it extra secure but not completely necessary. Then Wrap the cardboard In burlap or any other desired material or fabric. You can glue the first piece and last piece down to secure.

I’ve had this thick orange yarn laying in my yarn pile forever and was thrilled to finally find a good use for it. I wrapped the wreath base and secured the yarns end just wrapping a small portion of the wreath for a pop of colour. I was pleased with the way it turned out.

Making Leaves:
I picked out some fall colours of felt and hand cut out the leaves. I put a dot of hot glue at the stem and folded them so they would add a bit more texture and form. I made some leaves from the burlap material as well to add into the display. I glued them to the base going in a spiral to give the wreath some motion and visual interest. I just kept layering them until I liked it.

Final Touches:
I tied a loop in twine and hot glued it to the back so it could easily hang. I had also found this cute ornament at the dollar store and thought it was the perfect final touch to hang from the middle and went really well with all the colours I had picked. You can leave it empty or add anything here that suits your style. I strung it through the bottom of the twine and glued it into place so it would hang where I wanted it.

